Easter is upon us. The most important religious holiday for Christians as it symbolizes Resurrection. If you don’t practice Christianity, spring time is about renewal and hope. That is why this holiday is the most energizing and inspiring time for me. New colors, new foods, new looks. It’s about a fresh start and forgiveness. When I think about where I am merging art, lifestyle and foods I thought about what images I love to see for Easter. I love the richness and nobility of a Faberge Egg . I love dainty teas or coffee breaks with exquisite pastry. So using what I had on hand, marzipan, frozen cake, and edible colors from a cake decoration kit, I wanted to create exquisite edible gifts to celebrate this cleansing season. Continue reading “Marzipan Petit Fours For Easter, A Time of Resurrection”→
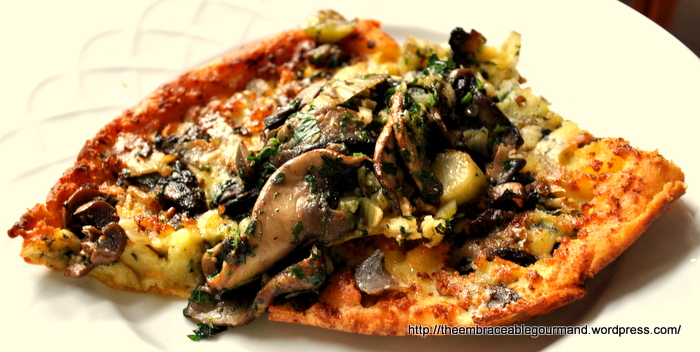
I still have to figure out where I’m going with both blogs. But if you’re looking for light savory recipe check out my latest post at the The emBRACEABLE Gourmand . Don’t miss a recipe.
A few years ago I invested in a few professional level courses at French Pastry School Chicago. The extensive workshops were a game changer for me and my level of confidence in the kitchen. I had some great instructors who are really pushing the scene the pastry arts . One of the co founders of the school Jacquy Pfeiffer just released a wonderful book for serious bakers called The Art Of French Pastry. It’s the definitive book on pastry. You may also remember him form the film Kings Of Pastry. I highly recommend this book. When I first heard of its existence in a press release I snapped it up. This book is percise and demanding . Recipes are given in weights and approxmiate measures, although weights are preferable for this type of baking. The layout of the recipes is how I remember from my course books at French Pastry Chicago and very exact in order of use. One needs to read and reread each recipe, because you will miss something. Its that precise. He even gives Before You Begin tips. I love how he finishes each recipe with a It’s Done When It’s Done and few helpful tips to look for. Sweet to Savory, this book has it , with delightful stories of his learning the craft of pastry.
This recipe takes two days. I made my first part of fermented dough mid morning day one. The next morning I finished the rest of the steps. The ovens need to preheat at a high temp for an hour with the baking stones. Be careful and have proper ventilation as my oven started to smoke. So make sure your baking stones are clear of any residue, etc and high temperatures are needed to achieve the proper technique.
It’s really important to let the bread in its final rise set and form a tiger crust with the beer mixture. I used a very dark Köstritzer Schwarzbier. As this is complex recipe with many details , I’m just giving an adaptation with the ingredients and basic techniques. For the wealth of all the other information, you need to get the book. Temperatures of ingredients, kneading techniques,etc are gone into more depth in the actual book.
Beer Bread / Pain à la Bière from The Art Of French Pastry
Author: Adapted from The Art of Pastry by Jacquy Pfeiffer
Recipe type: Bread
Cuisine: French/ Alsatian
Ingredients
Fermented Dough
Water 63 grams or ¼ cup
Dry Yeast 0.4 grams or ⅛ tsp
Bread Flour 100 grams or ¾ cup plus 1 tsp
Sea Salt 2 grams or ¼ tsp
Dough
15 grams Potato Flakes or 65 grams Unsalted mashed cooked Potatoes or 2½ tbsp or ⅓ cup
Water ( if using potato flakes) 50 grams or Scant ¼ cup
Bread Flour 125 grams or 1 cup
Rye Flour 60 grams or ½ cup
Sea Salt 5 grams or ¾ tsp
Dry Yeast 2 grams or ¾ tsp
Butter softened for pan( Low moisture, European Style )
Beer Mixture
Rye Flour 25 grams or 3 tbsp
Beer 45 grams or 3 tbsp
Sea Salt 1 gram or ⅛ tsp
Dry Yeast 0.5 grams or rounded ⅛ tsp
Rye Flour for dusting 15 grams or 2 tbsp
Water for steam 50 grams or scant ¼ cup
Instructions
Day 1
Combine warm water and yeast in bowl of stand mixer .
Add flour and sea salt.
Using the paddle attachment mix at first low, then switch to dough hook to medium speed for 5 minutes.
Rev up the speed a bit and continue to mix for 2 minutes.
Scrape down the dough hook and bowl. Cover with plastic wrap and let rest at room temperature for 1 hour.
Shape the dough into a ball, place in small bowl, and cover with plastic wrap overnight.
Day 2
Remove the fermented dough and bring to room temperature for 30 minutes.
Mix either your potato flakes with water or prep your mashed potato. Set aside.
Combine water , bread flour, rye flour,sea salt,dry yeast, and the fermented dough in the bowl of stand mixer.
Mix for 2 minutes with dough hook.
Add potaot mixture and continue to mix for an additional 2 minutes on medium speed until dough is smooth,
Scrape down dough, mix on medium speed for sevral more minutes until dough forms a smooth look and makes a slapping sound.
Cover dough in bowl with palstic wrap and let rest for 1.5 hour.
Dust surface with flour and turn dough out. Divide in two pieces.
Knead each piece by hand until you ba achieve a smooth round sphere.
Repeat with second piece.
Cover both pieces with plastic and let rest for 20 minutes.
Grease parchment lined sheet pans with softened butter.
Shape each loaf into a triangular shape ( fold the sides into the center and press and pinch the seams).
Place seam side down on parchment lined baking sheet apart from each other.
Prep your beer mixture by mixing all beer mixture ingredients in a small bowl.
Spread the beer mixture on each loaf with a pastry brush.
Sift rye flour over each beer mixture covered loaf .
Leave loaves uncovered now.
Preheat oven to 450 F and place pizza or baking stones in .middle of oven.
Place a small sheet pan on bottom rack of oven.
Preheat oven and stones for 1 hour to insure a crust is created on bread.
Continue to proof the loaves as the oven preheats for at least and hour. The beer mixture will start to crack to create a tiger skin.
Slide an oven peel under the parchment where the loaves are,open oven quickly and and slide onto the stones. Pour the 50 grams of water on lower baking sheet to create steam for crust.
Don't leave the oven door open longer than 30 seconds as you dont want to loose heat.
After 10 minutes open oven quickly and remove the parchment paper from under the loaves. Close door and continue to bake for another 25 minutes or until loaves are dark brown and form a hollow sound when tapped on bottom.
Looking for a tasty crowd pleasing treat for Game Day? These Old El Paso Deep Fried Quesadilla’s and Salsa treats will be be welcome treat. I confess, I’m not a huge sports fan, but I always make sure Certain Someone and any guests we may have lack for nothing in the food and drink categories. Using some Old El Paso ingredients, I created this appetizer of a quesadilla’s that’s amplified by frying .
This recipe has just a few uncomplicated steps with a little going a long way.
Old El Paso Deep Fried Quesadillas and Salsa for Game Day
Take the basic quesadilla up a notch on game day. Cut into wedges, and deep fried until golden and puffed, these will provide a tasty and filling treat as you root for your favorite team.
Author: coco cooks
Serves: 40 pieces
Ingredients
1 package of 10 Old El Paso Soft Tortillas
8-9 oz of grated Queso Chihuhua or any Mexican Style Melting Cheese
1 12 oz jar Old El Paso Sliced Jalapeño Peppers
2-3 eggs beaten
2 tablespoons milk
6 oz Panko style bread crumbs
Canola Oil for deep frying
Kosher Salt
1 16 oz jar of Old El Paso Thick and Chunky Salsa
Instructions
Assemble 5 tortillas with the grated cheese and a minimum of 4 jalapenos on each one. Do not over stuff with cheese, but have enough.
Top each with other tortilla and prepare to grill on a dry skillet, indoor grill or Panini maker.
Grill each quesadilla lightly until cheese has melted and fused the tortillas, but not very crispy. The grilling time should be a little less than how you would normally grill a quesadilla.
Remove and continue until all 5 are grilled.
Let cool.
Using a sharp knife cut each quesadilla into 4 wedges and set aside. You should have 40 wedges.
Preheat deep fryer or frying pan with oil to 350-370 °
In a small bowl beat the eggs and milk together.
Dip a few wedges at a time into the beaten egg mixture. Coat both sides.
Take the egg covered wedge and then dredge through Panko Crumbs making sure it’s evenly coated. If you want it extra crunchy, repeat the process and double dip.
Deep fry a few at a time in small batches until deep golden and slightly puffed.
Drain on paper towel lined tray and sprinkle with salt.
Keep warm in warming oven at 200 ° until ready to serve.
Serve with Old El Paso Thick and Chunky Salsa as a dip.
Notes
Be creative with the cheeses. You can buy jalapeño infused cheeses. If you want to really dress these up, serve also with guacamole and Sour Cream. These can be made ahead in stages ( grilling and cutting), then deep fried right before serving. Or these can make together entirely hours before, and reheated in a 375 ° oven until hot.
How was your Thanksgiving ? I have to say its one of my favorite cooking holidays, even if I’m just cooking for two. Things are picking up at this time of year, and I love quick tasty ideas to whip up. Certain Someone and my new work colleagues declared this recipe for Pillsbury Chocolate Almond Crescent Rolls a winner. I adapted a hero recipe from Pillsbury and added my own flair to it. It immediately took me back to my favorite snack as a student in Paris, Pain au Chocolate, with a luxurious almond twist, so perfect for the winter holidays.
The Pillsbury Chocolate Almond Crescent Rolls take one back to a French Boulangerie. Warm flaky Crescent Rounds filled with chocolate and almond paste are sure to be holiday breakfast or brunch treat.
Happy Holidays. I really enjoy thinking outside of the box and creating these recipes for General Mills. Don’t stress these holidays and learn to utilize tasty shortcuts when the occasions call for it.
Disclosure
*I have a received compensation from General Mills and my opinions are my own.
 Easter is upon us. The most important religious holiday for Christians as it symbolizes Resurrection. If you don’t practice Christianity, spring time is about renewal and hope. That is why this holiday is the most energizing and inspiring time for me. New colors, new foods, new looks. It’s about a fresh start and forgiveness. When I think about where I am merging art, lifestyle and foods I thought about what images I love to see for Easter. I love the richness and nobility of a Faberge Egg . I love dainty teas or coffee breaks with exquisite pastry. So using what I had on hand, marzipan, frozen cake, and edible colors from a cake decoration kit, I wanted to create exquisite edible gifts to celebrate this cleansing season. Continue reading “Marzipan Petit Fours For Easter, A Time of Resurrection”


